Create My First Campaign (Smart Builder)
Step‑by‑step guide to creating and launching a LinkedIn outreach campaign with LeadCarnival’s Smart Builder.

Written by Alex
Last updated 2 months ago
This tutorial walks you through building and launching a campaign using Smart Builder. You’ll add invite and message steps, apply required rules, review settings, and launch.
- Connect your LinkedIn account in Settings → Credentials.
- (Optional) Connect email if your sequence includes email steps.
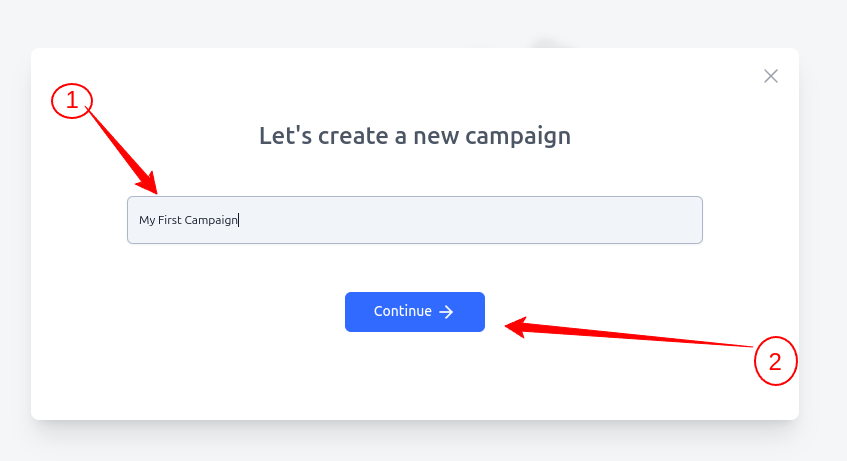
1) Create a new campaign
- Go to Campaign → Create Campaign
- Put campaign name and Choose Continue.
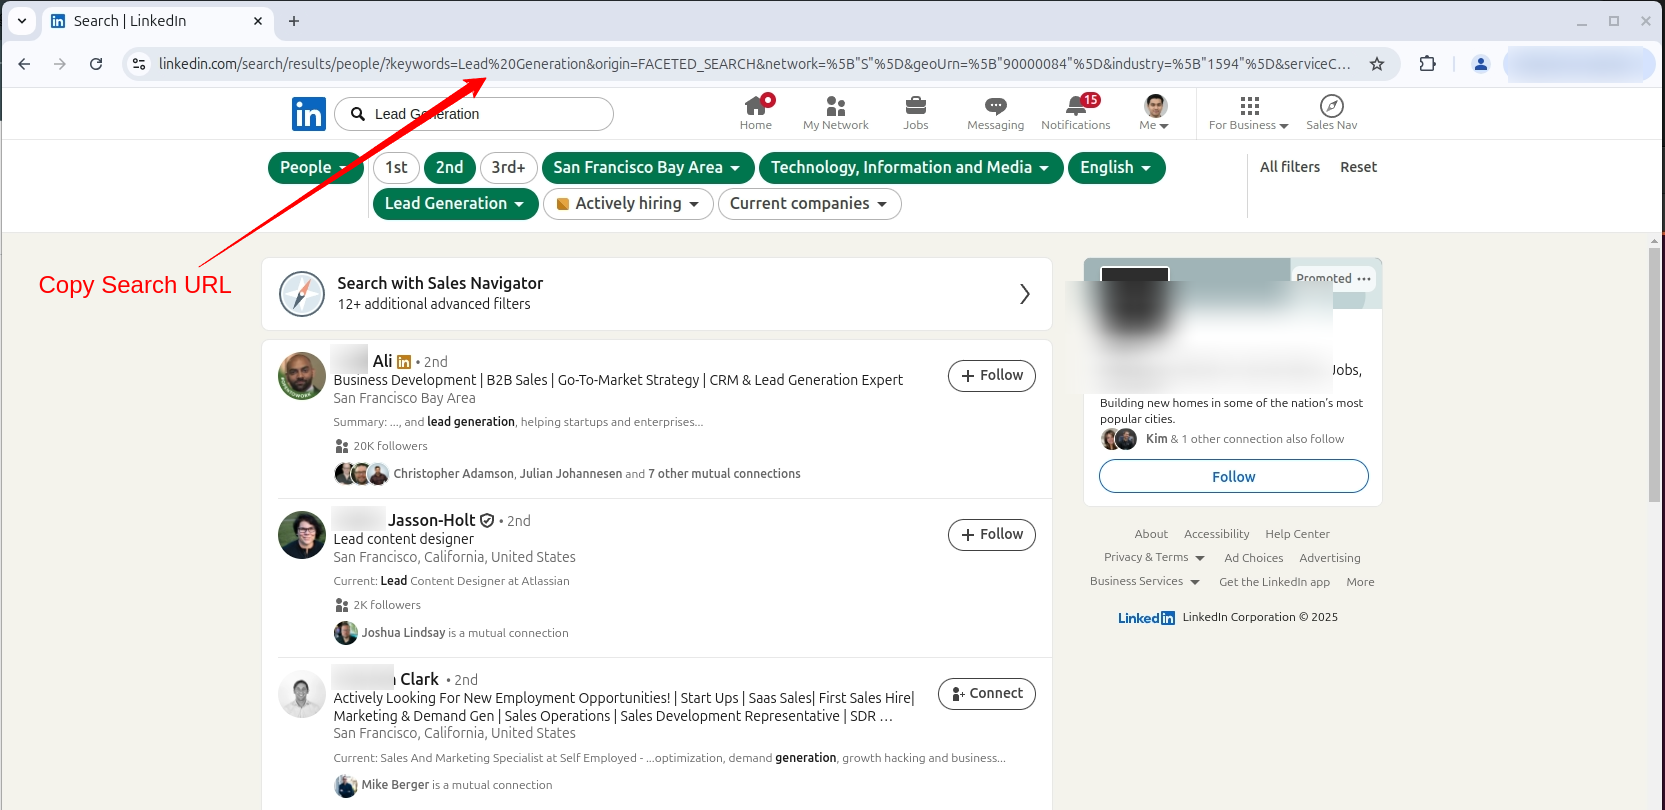
2) Create a lead list
-
Open your LinkedIn account in a browser.
-
Use the search bar to find your target audience - for example, "Lead Generation"
-
Once the results load, copy the full LinkedIn search URL from your browser’s address bar.
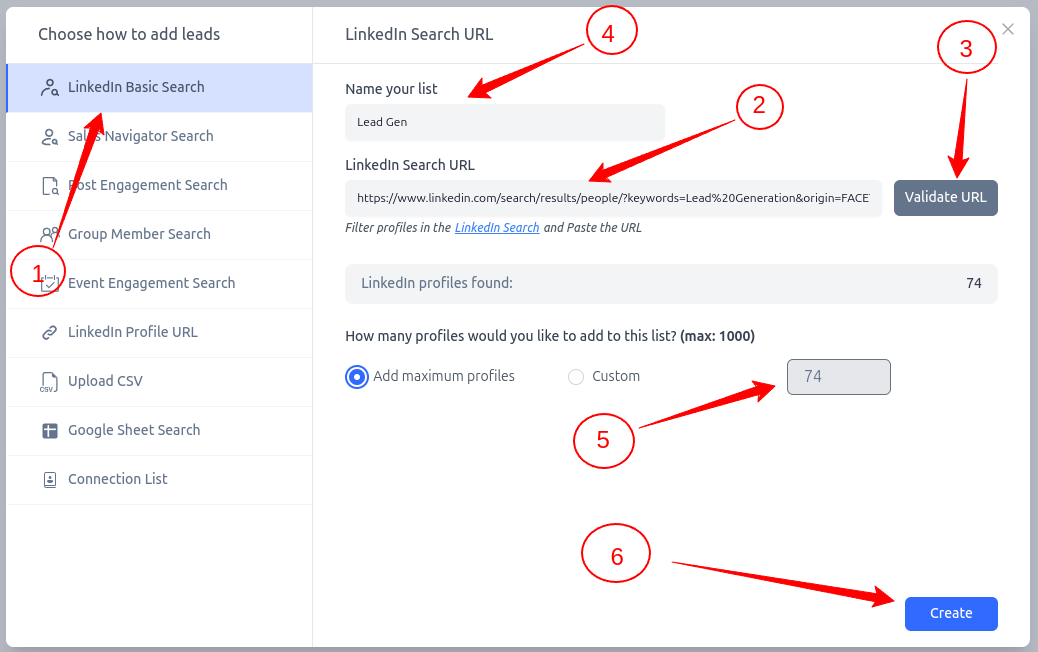
After click Continue, a modal will automatically open to help you add leads to your campaign.
- Choose LinkedIn Basic Search.
- For LinkedIn Basic Search, paste your search URL in the LinkedIn Search URL field.
- Click Validate URL to confirm it's a valid search link
- Give your list a name under Name your list - for example "Lead Gen"
- Choose how many profiles to import (up to 1000)
- Finally, click Create to add the leads.
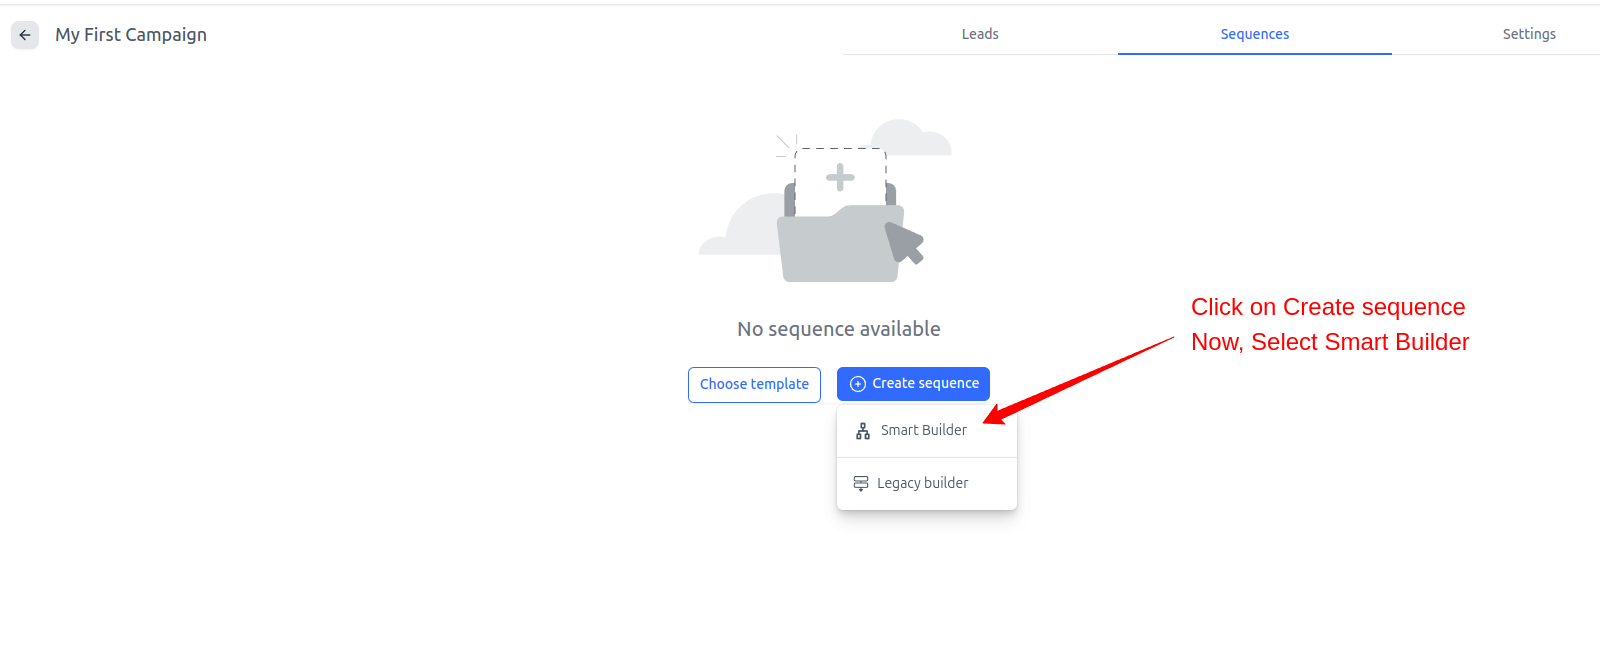
3. Open smart sequence canvas
Click on Create sequence and choose Smart Builder. It will open smart sequence builder canvas.
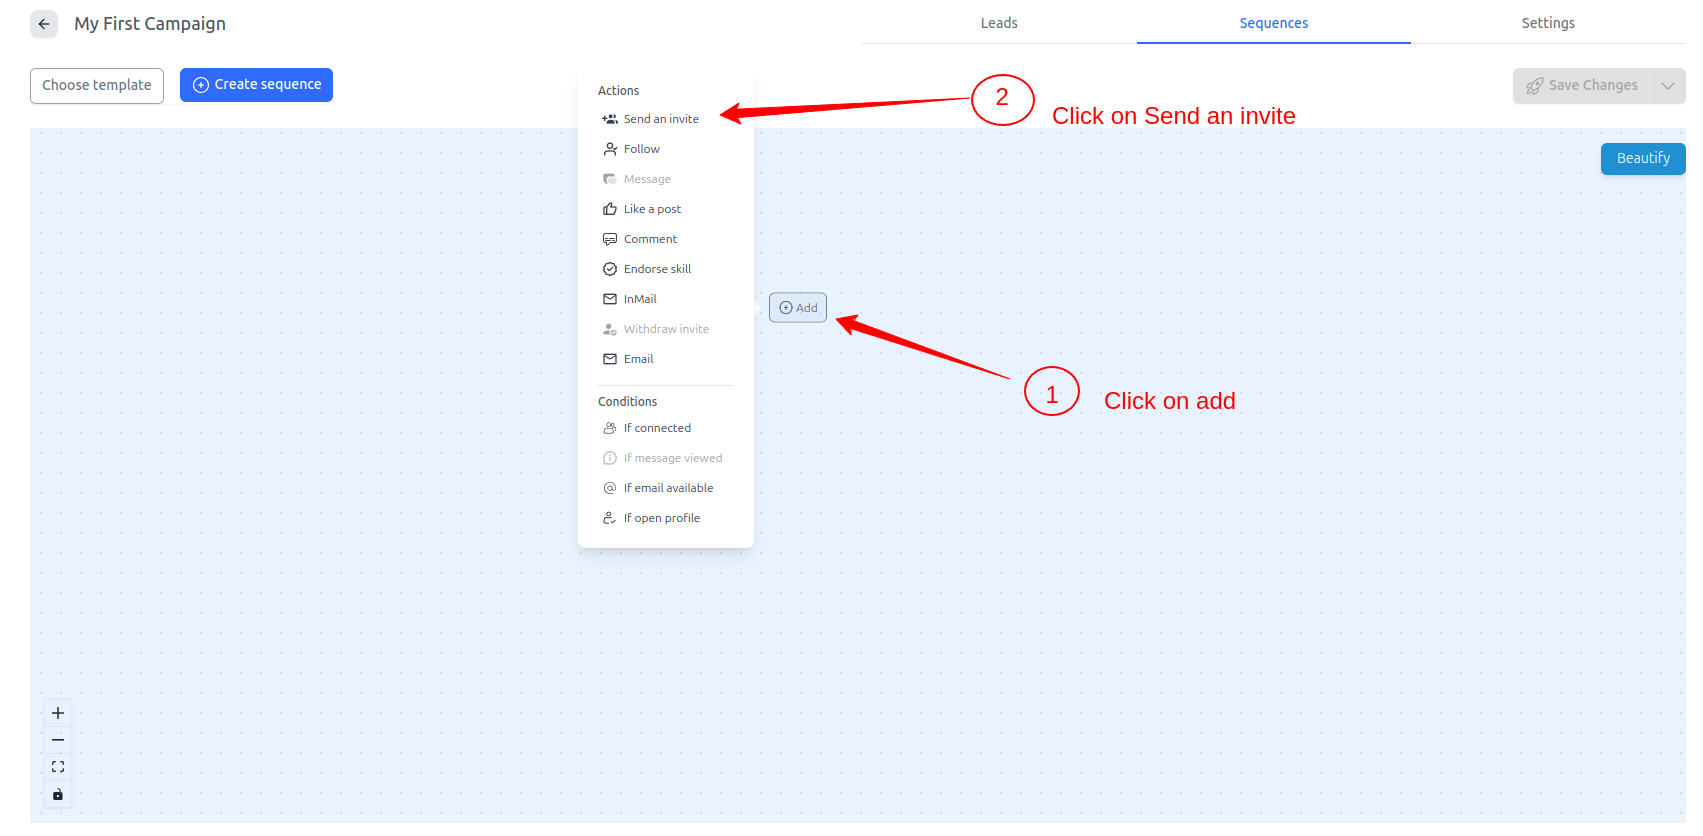
4. Add your first step
- Click on add button
- Choose action node from modal - Send an invite.
5) Write your invitation message
- Click Send an invite to open the message window.
- Write your invite note (you can use variables like First name, Company, etc.).
- Click Save.
- When you finish your invitation steps, click Add to add another step.

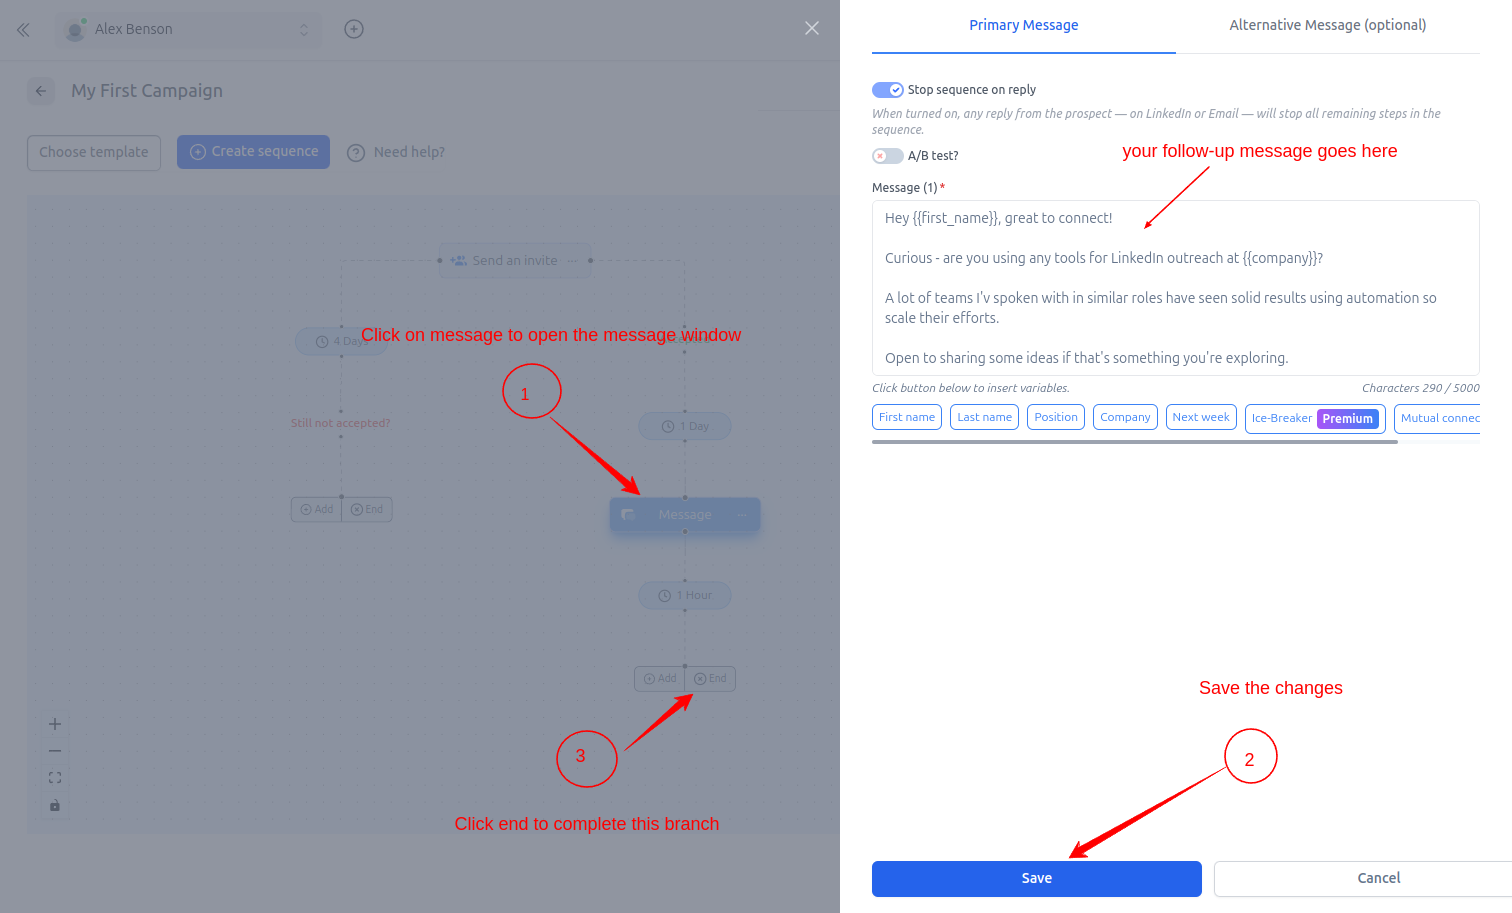
6) Add a follow‑up message (Accepted path)
- Click Message to open the message window.
- Write your follow‑up message (e.g., after 1 day).
- Click Save.
- Click End to complete this branch of your sequence.
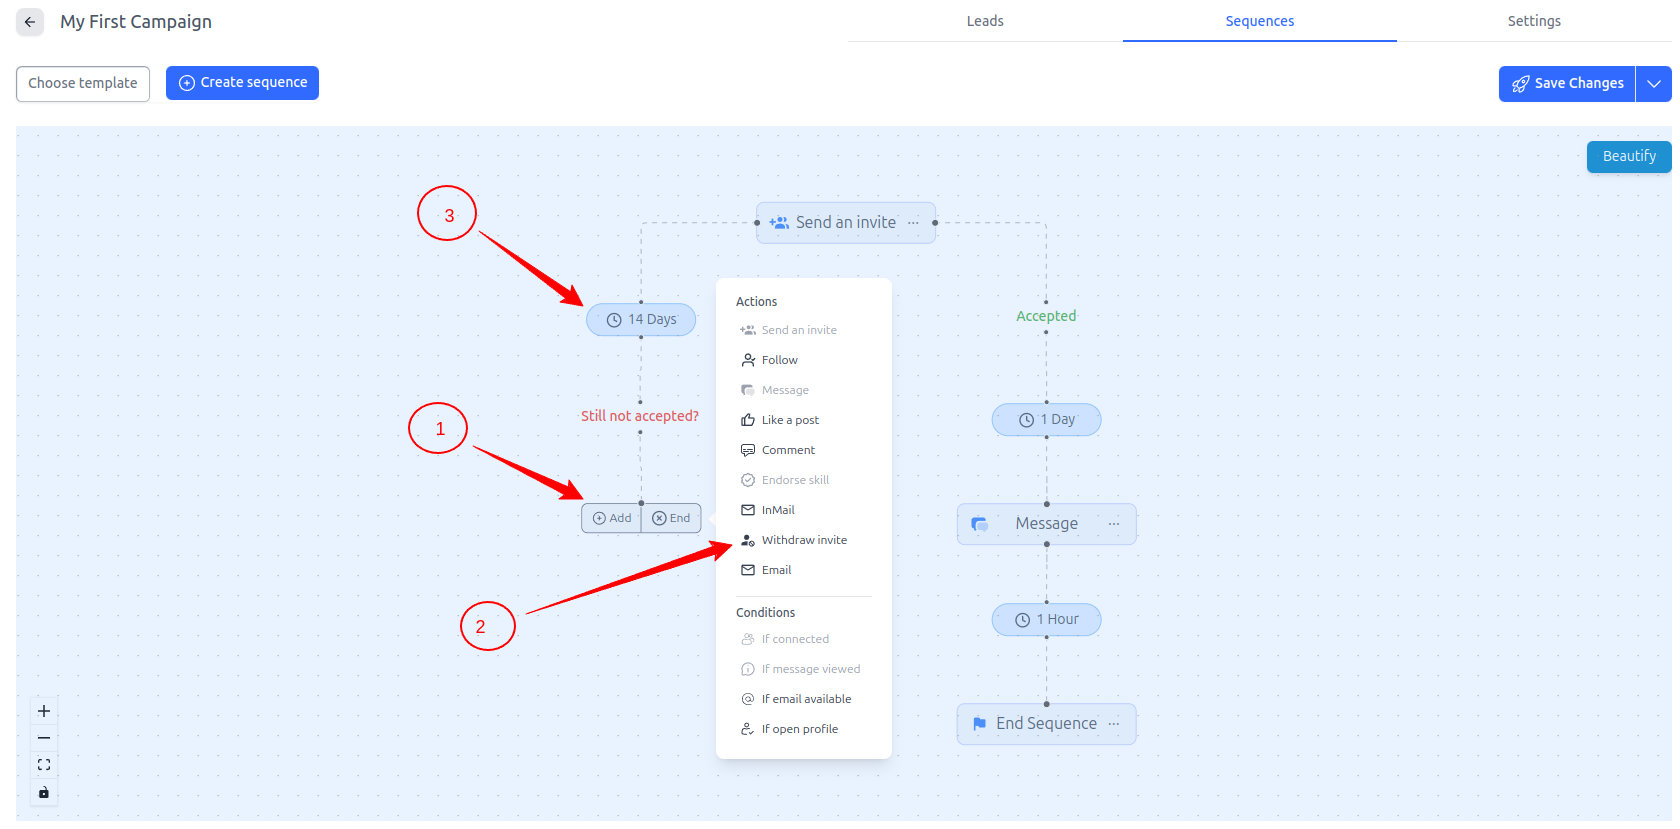
7) Add Withdraw for non‑accepted invites (Required)
- On the Not accepted path, add Withdraw (e.g., after 14 days).
- End Sequence after Withdraw.
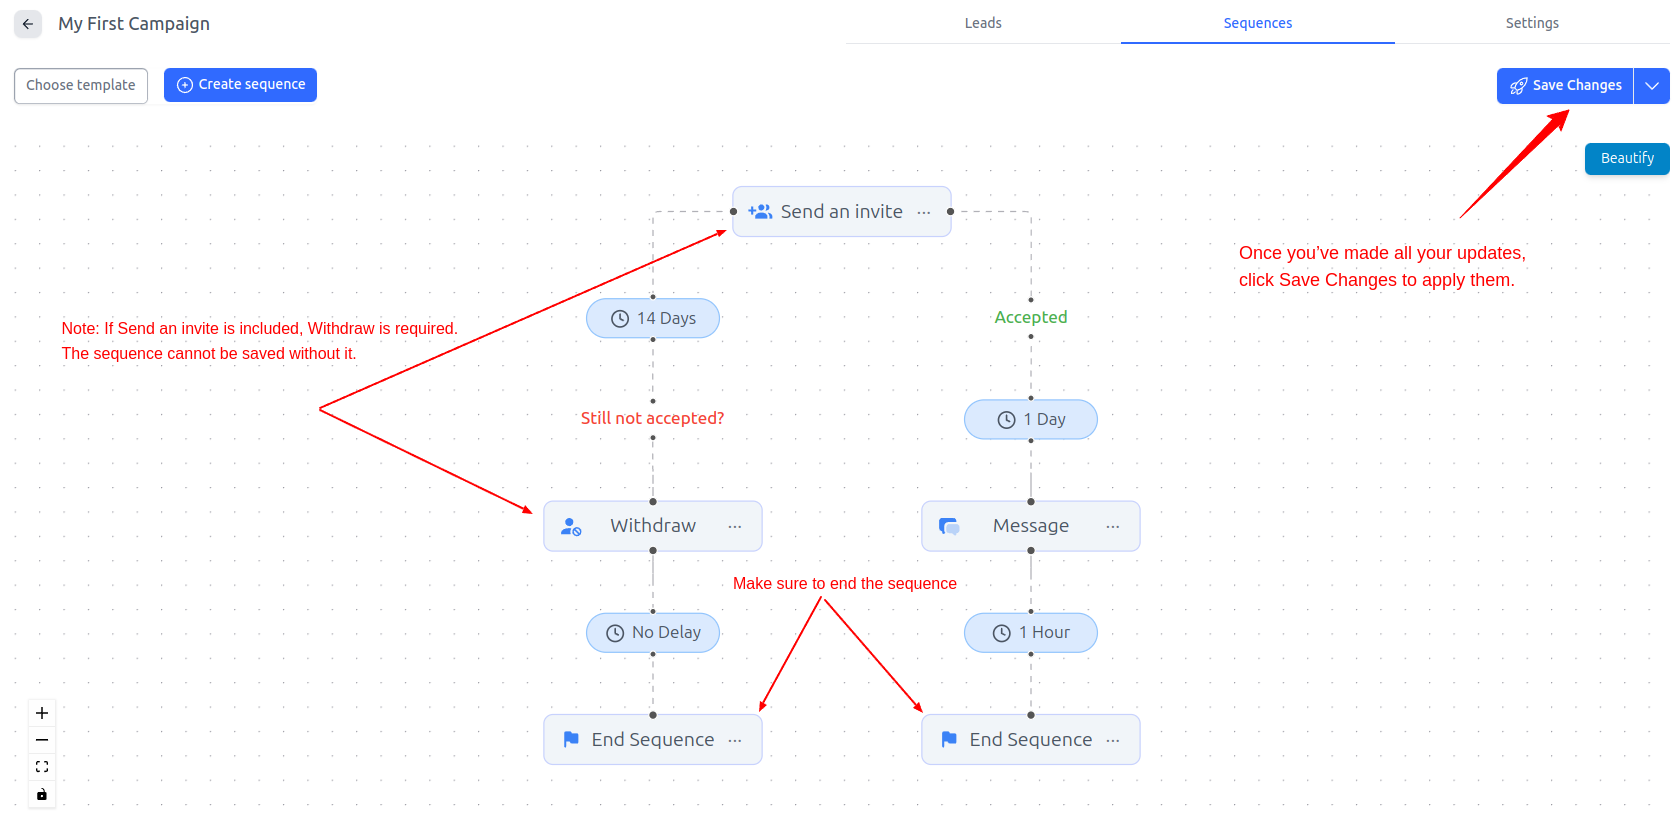
6) Save your sequence
After making all your updates, click Save Changes.
If Send an invite is included, Withdraw is required. The sequence cannot be saved without it.
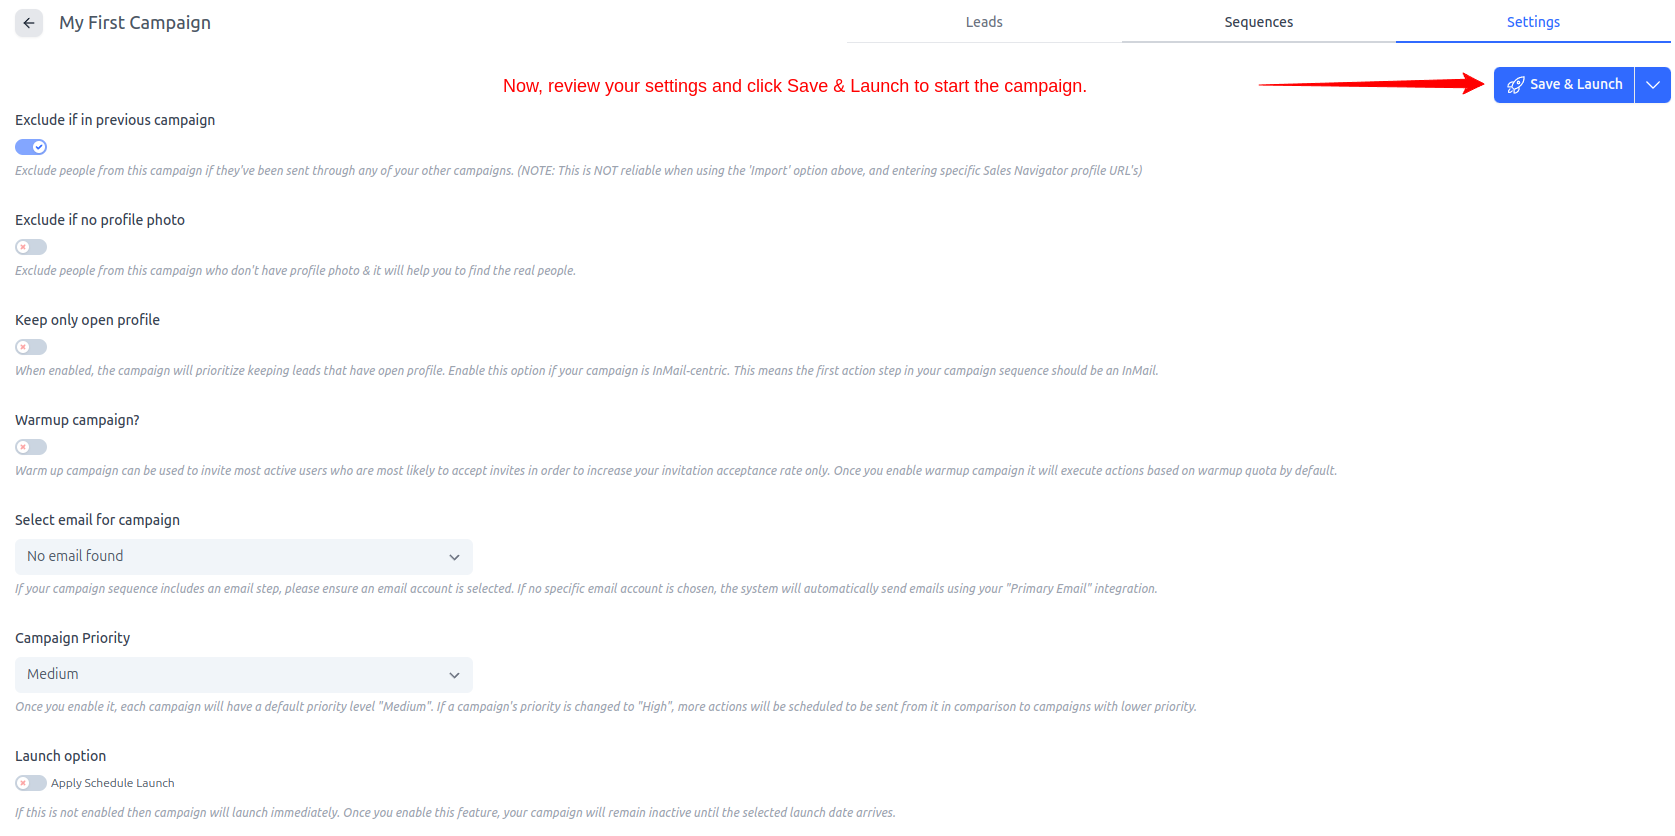
7) Review settings and launch
- Go to the Settings tab of your campaign.
- Review options like exclusions, warmup, email selection, priority, and launch timing.
- Click Save & Launch to start the campaign.
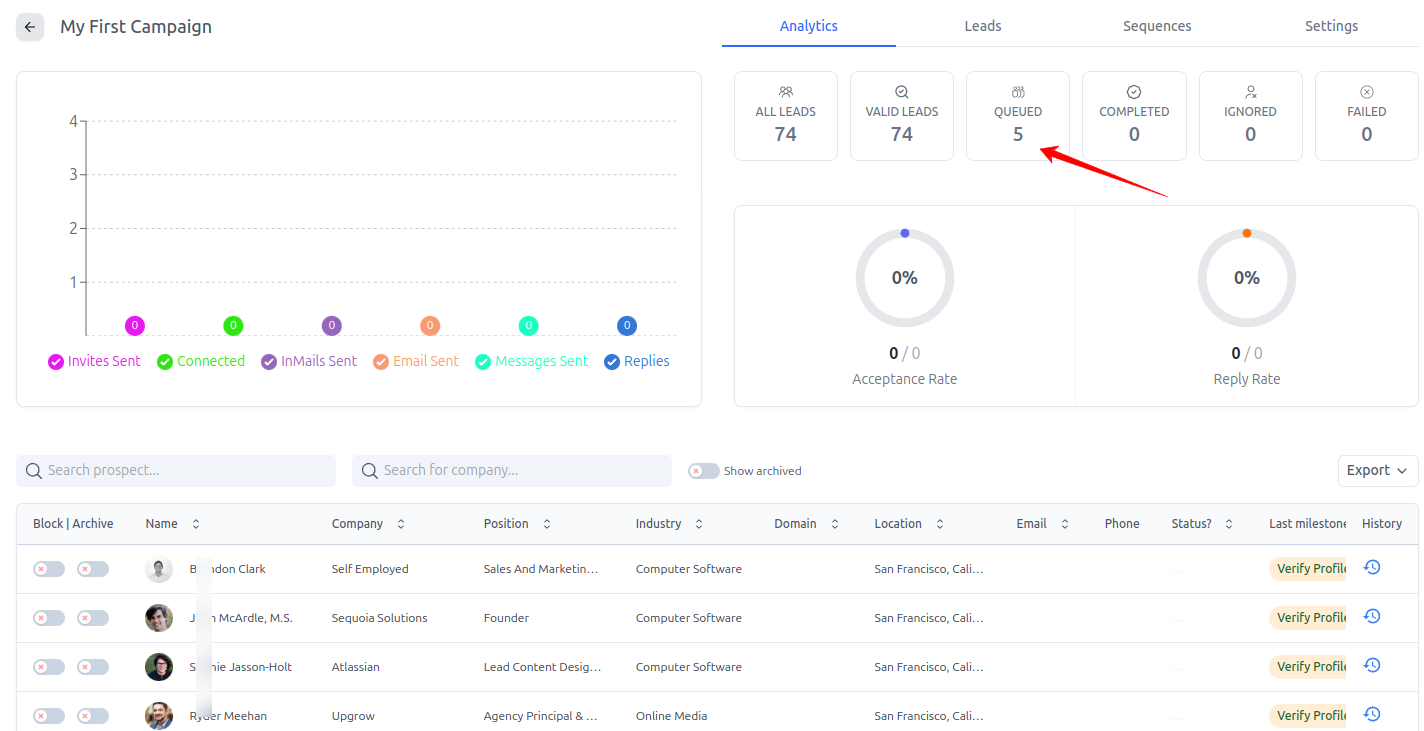
9) Monitor your campaign
- You’ll see the Analytics of this campaign.
- Five leads are automatically selected to begin the sequence.
Troubleshooting & Notes
-
Why can’t I save the sequence? Ensure you’ve added Withdraw after Send an invite, and End Sequence on all branches.
-
What does “Save & Launch” do? It stores your settings and immediately activates the campaign (or schedules it, if you selected a launch time).
Need help or ideas for your first campaign? Reach out to our support team anytime at support@leadcarnival.com.